7.41d Centaur Warrunner Guide
July 31st, 2026
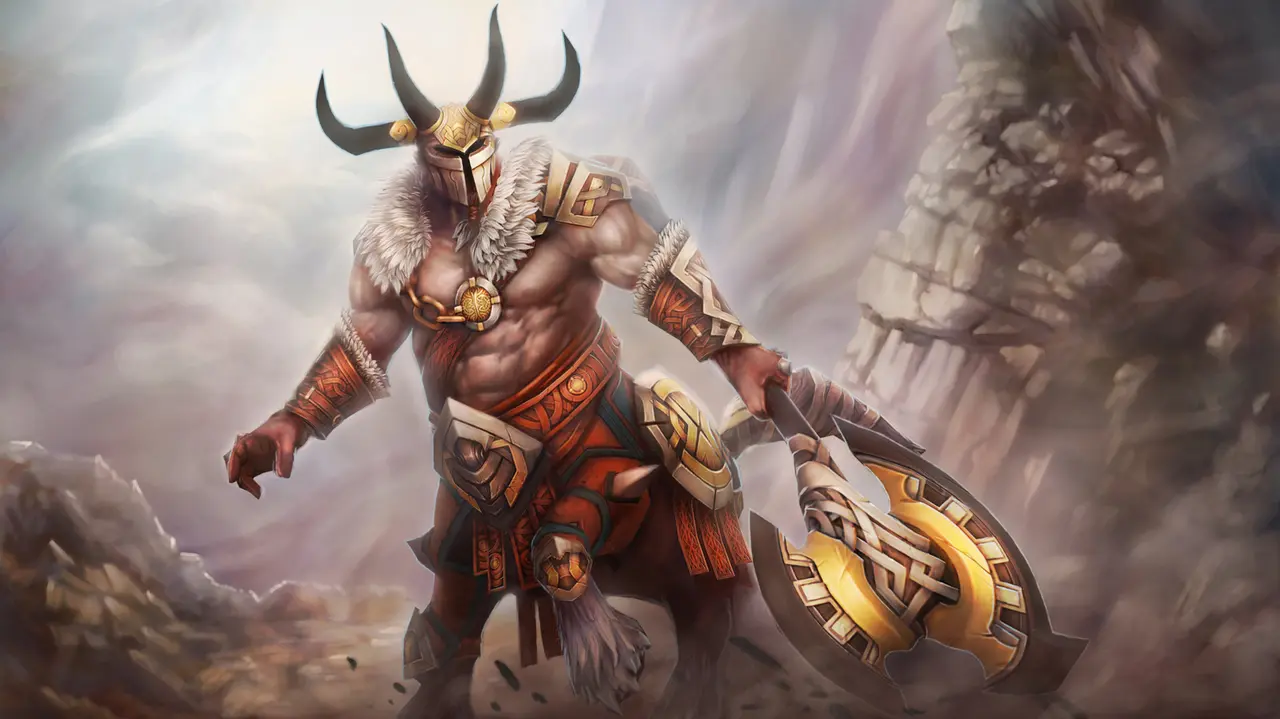
 Centaur Warrunner is an MMR-climbing machine in the offlane (Position 3) of the 7.41d patch. This guide breaks down the by-the-numbers build everyone is using right now—from abilities and skill build to talents, items, and matchups.
I. Abilities
To master Centaur Warrunner, first internalize his innate ability  Horsepower: it converts 40% of his strength into bonus movement speed, and every extra point of strength adds a bit more. Key point—this speed bonus does NOT stack with boots, so nobody buys boots on Centaur Warrunner anymore. The gold that used to go into
  Phase Boots or
  Power Treads now goes entirely into
  Heart of Tarrasque and
  Assault Cuirass—strength items effectively become your upgraded boots, and that's the core logic of this build.
Centaur Warrunner, first internalize his innate ability Horsepower: it converts 40% of his strength into bonus movement speed, and every extra point of strength adds a bit more. Key point—this speed bonus does NOT stack with boots, so nobody buys boots on Centaur Warrunner anymore. The gold that used to go into Phase Boots or Power Treads now goes entirely into Heart of Tarrasque and Assault Cuirass—strength items effectively become your upgraded boots, and that's the core logic of this build.Let's break down each ability; once you understand what they do, the item choices become obvious.  Hoof Stomp is Centaur Warrunner's core area-of-effect disable: radius 325, 70–280 damage, 1.6–2.2s stun, 18s cooldown initially, dropping to 12s when maxed. It has a 0.5s cast point during which you're disarmed but can still move—meaning you can reposition before landing the stun. Blinking in with
  Blink Dagger and stomping out Hoof Stomp is the opening combo of every teamfight.
Hoof Stomp is Centaur Warrunner's core area-of-effect disable: radius 325, 70–280 damage, 1.6–2.2s stun, 18s cooldown initially, dropping to 12s when maxed. It has a 0.5s cast point during which you're disarmed but can still move—meaning you can reposition before landing the stun. Blinking in with Blink Dagger and stomping out Hoof Stomp is the opening combo of every teamfight. Retaliate is the root of Centaur Warrunner's late-game dominance: every time you're attacked, it returns 15–45 damage plus extra damage based on your strength; when maxed, each hit taken returns physical damage equal to 40% of your strength. A neat fact—Retaliate pierces spell immunity, so even enemies with spell immunity can't block the return damage. Physical cores who pop
  Black King Bar to burst you still eat the reflected damage. Stack that with the massive strength from Heart of Tarrasque, and Centaur Warrunner becomes the natural counter to every physical damage core.
 Double Edge deals 120–300 base damage plus an extra 60%–150% of your strength as damage to enemies in a small area around the target, at the cost of taking the same amount of damage yourself. Under the right build, though, this downside is negligible—the high health regen from Heart of Tarrasque plus
  Helm of the Dominator easily offsets the self-damage. The key point: Double Edge can never kill you no matter what—it always leaves you on at least 1 HP. Use it to harass in lane and to open with a burst of damage before teamfights.
The ultimate  Stampede is Centaur Warrunner's ultimate ability: on cast, your whole team gets maximum move speed for 3.5–4.5s, and enemies you charge through take damage based on Centaur Warrunner's strength. Initial cooldown is 100s, dropping to 90s at max level. This is not a chase tool—it's an engage tool. Pair it with the blink-stomp combo to close distance, or use it reactively to peel for your own cores and run down enemies who overextend onto your backline.
Stampede is Centaur Warrunner's ultimate ability: on cast, your whole team gets maximum move speed for 3.5–4.5s, and enemies you charge through take damage based on Centaur Warrunner's strength. Initial cooldown is 100s, dropping to 90s at max level. This is not a chase tool—it's an engage tool. Pair it with the blink-stomp combo to close distance, or use it reactively to peel for your own cores and run down enemies who overextend onto your backline. Aghanim's Scepter unlocks the
  Work Horse ability: Centaur Warrunner gets a free "ride"—he gains Stampede on himself for 6s and can also ferry an ally along, on a 35s cooldown. This is a flexible late-game pickup, excellent for split-pushing and rotations.
 Aghanim's Shard adds a slow to Double Edge: hit enemies are slowed by 25% move speed for 2s, and for each enemy hero hit, Centaur Warrunner gains 12% bonus strength, stacking up to five times. If Double Edge hits three enemies in a fight, you get 36% bonus strength for 15s—basically half a Heart of Tarrasque for free.
II. Skill Build
Level 1 goes to Hoof Stomp first—a reliable stun can secure early kills, and the spell damage helps with last-hitting. Your level 2 point depends on the lane: if the enemy is constantly auto-attacking to wear you down, take Retaliate; if you and your support can coordinate a stable kill, take Double Edge for burst. Allocate accordingly. After level 2, max Retaliate first—most players get this order wrong. The tankiness Retaliate provides lets you trade comfortably in lane, and once maxed you can farm jungle camps with almost no HP loss, giving you both efficient farming and self-preservation. Take your ultimate at the standard levels 6, 12, and 18.
Hoof Stomp first—a reliable stun can secure early kills, and the spell damage helps with last-hitting. Your level 2 point depends on the lane: if the enemy is constantly auto-attacking to wear you down, take Retaliate; if you and your support can coordinate a stable kill, take Double Edge for burst. Allocate accordingly. After level 2, max Retaliate first—most players get this order wrong. The tankiness Retaliate provides lets you trade comfortably in lane, and once maxed you can farm jungle camps with almost no HP loss, giving you both efficient farming and self-preservation. Take your ultimate at the standard levels 6, 12, and 18.Once Retaliate is maxed, there are two skill paths: if teamfights are frequent and your team needs sustained crowd control to lock targets down, put secondary points into Hoof Stomp; if the game is slow and you're focused on farming and split-pushing, max Double Edge second for a big jump in clear speed. Both are viable—pick based on the game.
Retaliate is maxed, there are two skill paths: if teamfights are frequent and your team needs sustained crowd control to lock targets down, put secondary points into Hoof Stomp; if the game is slow and you're focused on farming and split-pushing, max Double Edge second for a big jump in clear speed. Both are viable—pick based on the game.III. Talents
Go all-right on the talent tree. This build's core is stacking strength, and every right-side talent amplifies the value of that strength. Level 10: +4 health regen, boosting your jungle farming and trade sustain; the left option gives 15 move speed, but Centaur Warrunner already gets speed from Horsepower, items, and Blink Dagger, so he's never short on mobility and doesn't need it. Level 15: +10 strength is a massive spike—10 strength is 200 HP, and it lifts both Double Edge and Retaliate damage while adding more move speed through Horsepower. From this point on, Centaur Warrunner is tanky enough to be very hard to kill. Level 20: +45 Retaliate damage—every enemy auto-attack now reflects more damage, which can outright end the game against physical cores. Level 25: unlock the Retaliate aura, sharing the Retaliate effect with your whole team—whenever an enemy attacks any of your teammates, they eat the reflected damage.
Centaur Warrunner already gets speed from Horsepower, items, and Blink Dagger, so he's never short on mobility and doesn't need it. Level 15: +10 strength is a massive spike—10 strength is 200 HP, and it lifts both Double Edge and Retaliate damage while adding more move speed through Horsepower. From this point on, Centaur Warrunner is tanky enough to be very hard to kill. Level 20: +45 Retaliate damage—every enemy auto-attack now reflects more damage, which can outright end the game against physical cores. Level 25: unlock the Retaliate aura, sharing the Retaliate effect with your whole team—whenever an enemy attacks any of your teammates, they eat the reflected damage.IV. Starting Items
There are three viable starting builds. Set 1: two  Gauntlets of Strength, a
  Iron Branch, a
  Circlet, and a
  Tango—balanced stats, and the Circlet builds into a later item.
Gauntlets of Strength, a Iron Branch, a Circlet, and a Tango—balanced stats, and the Circlet builds into a later item.Set 2: two Gauntlets of Strength, a  Ring of Protection, and two Iron Branch. The Ring of Protection gives armor, giving you the edge in trades.
Gauntlets of Strength, a Ring of Protection, and two Iron Branch. The Ring of Protection gives armor, giving you the edge in trades.Set 3: two Gauntlets of Strength and two Circlet—pure stats, maximizing lane survivability.
Gauntlets of Strength and two Circlet—pure stats, maximizing lane survivability.In lane, hold the wave in the middle, away from your own tower. Against ranged supports like  Jakiro and
  Windranger, force them to step up to trade, and if they dare harass, trade back hard. With a Hoof Stomp stun of your own and any disable from your support, level 2 is a prime kill window.
Jakiro and Windranger, force them to step up to trade, and if they dare harass, trade back hard. With a Hoof Stomp stun of your own and any disable from your support, level 2 is a prime kill window.Here's a climbing concept: the HP threshold—simply put, the minimum HP you need to survive when the enemy dumps their whole combo on you. Above the threshold, trade freely; below it, back off. Centaur Warrunner has high base HP, and  Bracer amplifies that advantage, so your survivability threshold is naturally high—use it. If the lane is truly unplayable, have your support bait the enemy while you slip behind their tower to clear the wave alone.
Centaur Warrunner has high base HP, and Bracer amplifies that advantage, so your survivability threshold is naturally high—use it. If the lane is truly unplayable, have your support bait the enemy while you slip behind their tower to clear the wave alone.V. Mid-to-Late Item Order
Here's the full item order everyone's using now. First item:  Helm of Iron Will, whose high health regen lets you trade through the whole lane without frequent fountain trips, then upgrade Helm of Iron Will into Helm of the Dominator. The moment Helm of the Dominator is done, immediately go dominate a useful creep. A dominated creep can push waves, stack camps, and act as a ward in the late game. After Helm of the Dominator, buy
  Ring of Tarrasque and finish Heart of Tarrasque around 19 minutes—this covers Centaur Warrunner's low-armor weakness, and the massive HP pool ensures you can't be blown up. Around 21 minutes, get Blink Dagger; the Blink Dagger-into-Hoof Stomp combo is your teamfight engage from here on out. Then build Black King Bar. Once Black King Bar is up, build Assault Cuirass—it gives the whole team an armor aura, applies an armor reduction to enemies, and boosts your own attack speed.
Helm of Iron Will, whose high health regen lets you trade through the whole lane without frequent fountain trips, then upgrade Helm of Iron Will into Helm of the Dominator. The moment Helm of the Dominator is done, immediately go dominate a useful creep. A dominated creep can push waves, stack camps, and act as a ward in the late game. After Helm of the Dominator, buy Ring of Tarrasque and finish Heart of Tarrasque around 19 minutes—this covers Centaur Warrunner's low-armor weakness, and the massive HP pool ensures you can't be blown up. Around 21 minutes, get Blink Dagger; the Blink Dagger-into-Hoof Stomp combo is your teamfight engage from here on out. Then build Black King Bar. Once Black King Bar is up, build Assault Cuirass—it gives the whole team an armor aura, applies an armor reduction to enemies, and boosts your own attack speed.Now the situational pickups. Aghanim's Shard upgrades Double Edge with a slow and strength stacks for each hero hit—once your core items are done, picking up Aghanim's Shard is very cost-efficient. Aghanim's Scepter is the next big power spike; in most games you pick it up right after Assault Cuirass. If the enemy splits the map and picks off your teammates, Aghanim's Scepter can flip the situation—your Aghanim's Scepter-fueled rotation speed outpaces them and you dictate the team's tempo. Against magic-burst comps, build  Pipe of Insight; if they pick heroes like
  Necrophos,
  Viper,
  Zeus, or
  Snapfire, you can have Pipe of Insight as early as 16 minutes. If their magic damage is high, Pipe of Insight can come before a core item or right after Aghanim's Scepter, depending on how badly the team needs the magic shield.
Aghanim's Shard upgrades Double Edge with a slow and strength stacks for each hero hit—once your core items are done, picking up Aghanim's Shard is very cost-efficient. Aghanim's Scepter is the next big power spike; in most games you pick it up right after Assault Cuirass. If the enemy splits the map and picks off your teammates, Aghanim's Scepter can flip the situation—your Aghanim's Scepter-fueled rotation speed outpaces them and you dictate the team's tempo. Against magic-burst comps, build Pipe of Insight; if they pick heroes like Necrophos, Viper, Zeus, or Snapfire, you can have Pipe of Insight as early as 16 minutes. If their magic damage is high, Pipe of Insight can come before a core item or right after Aghanim's Scepter, depending on how badly the team needs the magic shield. Consecrated Wraps is another option against magic comps—like a single-target Pipe of Insight that shields only you with no team aura. If your team already has magic resistance covered and you just need more survivability, pick Consecrated Wraps. Against single-target lock-down comps like
  Bane,
Bane,  Lion, or
  Naga Siren, buy
  Lotus Orb—it reflects targeted spells and gives armor and mana regen. When the enemy has plenty of physical damage but low armor, add
  Shiva's Guard: its active deals area damage and cuts enemy attack speed. In ultra-late games,
  Octarine Core shortens the cooldowns of Hoof Stomp and Stampede, letting you fight more often.
Another build path worth mentioning— Vanguard is still viable. Many pros' mainstream build is Vanguard, Blink Dagger, Heart of Tarrasque, Aghanim's Shard, and Lotus Orb. If you prefer the early tankiness of Vanguard and don't want to go the Helm of the Dominator route, this build wins games too. Top offlaners are mostly on the Helm of the Dominator system right now, but Vanguard is a battle-tested, higher-fault-tolerance option—choose based on your playstyle.
Vanguard is still viable. Many pros' mainstream build is Vanguard, Blink Dagger, Heart of Tarrasque, Aghanim's Shard, and Lotus Orb. If you prefer the early tankiness of Vanguard and don't want to go the Helm of the Dominator route, this build wins games too. Top offlaners are mostly on the Helm of the Dominator system right now, but Vanguard is a battle-tested, higher-fault-tolerance option—choose based on your playstyle.VI. Matchups
Your biggest lane advantages are against  Faceless Void (+3.9% win rate), then
  Phantom Assassin (+2%),
  Terrorblade (+1.2%), and slight edges against
  Luna and
  Phantom Lancer. These are all illusion-based physical cores: Retaliate returns all their auto-attack damage, Hoof Stomp locks them down reliably, and Heart of Tarrasque makes you too tanky to kill.
Faceless Void (+3.9% win rate), then Phantom Assassin (+2%), Terrorblade (+1.2%), and slight edges against Luna and Phantom Lancer. These are all illusion-based physical cores: Retaliate returns all their auto-attack damage, Hoof Stomp locks them down reliably, and Heart of Tarrasque makes you too tanky to kill.Your worst lane matchups are  Shadow Fiend (-8.7%),
  Undying (-8.1%),
  Drow Ranger (-7.7%),
  Warlock (-5.0%), and
  Silencer (-3.9%). They either have reliable healing or deal persistent damage that neutralizes your trading advantage.
Shadow Fiend (-8.7%), Undying (-8.1%), Drow Ranger (-7.7%), Warlock (-5.0%), and Silencer (-3.9%). They either have reliable healing or deal persistent damage that neutralizes your trading advantage.Your best overall matchups:  Pangolier (57.5% win rate),
  Anti-Mage (55.5%),
  Void Spirit (55%),
  Skywrath Mage (55%), and Phantom Lancer (55%). Any high-mobility, squishy core gets one-shot by the blink-stomp combo.
Pangolier (57.5% win rate), Anti-Mage (55.5%), Void Spirit (55%), Skywrath Mage (55%), and Phantom Lancer (55%). Any high-mobility, squishy core gets one-shot by the blink-stomp combo.Your hardest overall matchups:  Bounty Hunter,
  Ember Spirit,
  Lifestealer, and Snapfire. Lifestealer gets spell immunity from
  Rage and high lifesteal to grind you down; Ember Spirit kites endlessly with
  Sleight of Fist; Snapfire harasses from range all game; Bounty Hunter tracks you and chips with shurikens. If they pick these, coordinate a counter-pick with your team.
  Timbersaw is a medium counter to Centaur Warrunner—he kites with mobility,
  Reactive Armor cancels out your Hoof Stomp damage, and
  Whirling Death shreds your HP fast, so play carefully.
  Puck can use
  Phase Shift to dodge your Hoof Stomp, so pop Stampede to force your way in or wait out his Phase Shift before acting. Ranged supports with poke like Zeus, Skywrath Mage, and
  Lina chip you down before you can blink in with Blink Dagger—just build Pipe of Insight to solve that. The core value of this build isn't just winning teamfights—it ends games.
Bounty Hunter, Ember Spirit, Lifestealer, and Snapfire. Lifestealer gets spell immunity from Rage and high lifesteal to grind you down; Ember Spirit kites endlessly with Sleight of Fist; Snapfire harasses from range all game; Bounty Hunter tracks you and chips with shurikens. If they pick these, coordinate a counter-pick with your team. Timbersaw is a medium counter to Centaur Warrunner—he kites with mobility, Reactive Armor cancels out your Hoof Stomp damage, and Whirling Death shreds your HP fast, so play carefully. Puck can use Phase Shift to dodge your Hoof Stomp, so pop Stampede to force your way in or wait out his Phase Shift before acting. Ranged supports with poke like Zeus, Skywrath Mage, and Lina chip you down before you can blink in with Blink Dagger—just build Pipe of Insight to solve that. The core value of this build isn't just winning teamfights—it ends games.VII. Summary
In one sentence: Helm of the Dominator controls map space, Heart of Tarrasque makes you nearly unkillable, Blink Dagger into Hoof Stomp is the engage of every teamfight, and Retaliate ignores Black King Bar to reap enemy cores. In 7.41d, if you play offlane and don't first-pick Centaur Warrunner in ranked, you're throwing away MMR. Pick Centaur Warrunner, follow this build, and your win rate will jump significantly.
Helm of the Dominator controls map space, Heart of Tarrasque makes you nearly unkillable, Blink Dagger into Hoof Stomp is the engage of every teamfight, and Retaliate ignores Black King Bar to reap enemy cores. In 7.41d, if you play offlane and don't first-pick Centaur Warrunner in ranked, you're throwing away MMR. Pick Centaur Warrunner, follow this build, and your win rate will jump significantly.