Ember Spirit Detailed Guide
August 3rd, 2026
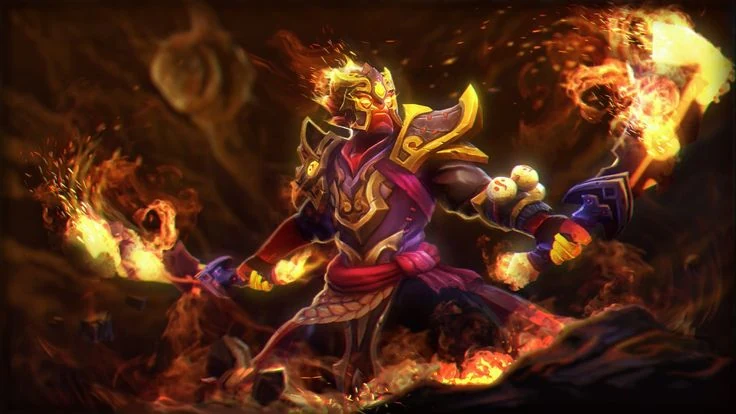
I. Skills:  Searing Chains
Searing ChainsThe key to using Searing Chains well is timing. Many players habitually chain  Sleight of Fist into Searing Chains; this combo works well in many situations, but in most games you should keep
  Flame Guard active as much as possible. In teamfights, if you can get in an enemy's face, dive in with
  Fire Remnant and keep right-clicking—keep dealing damage as they flee, then drop Searing Chains and cut to the front of their escape path to body-block. Predicting the enemy's movement and staying glued to them throughout is the core of playing
  Ember Spirit well. Many players' damage falls off late game, and the root cause is not understanding that Flame Guard is your core damage source. If you spend the whole game kiting at long range with Sleight of Fist, hitting a few times, backing off, then Sleight of Fist-into-rooting, that style simply does not suit Ember Spirit.
Searing Chains well is timing. Many players habitually chain Sleight of Fist into Searing Chains; this combo works well in many situations, but in most games you should keep Flame Guard active as much as possible. In teamfights, if you can get in an enemy's face, dive in with Fire Remnant and keep right-clicking—keep dealing damage as they flee, then drop Searing Chains and cut to the front of their escape path to body-block. Predicting the enemy's movement and staying glued to them throughout is the core of playing Ember Spirit well. Many players' damage falls off late game, and the root cause is not understanding that Flame Guard is your core damage source. If you spend the whole game kiting at long range with Sleight of Fist, hitting a few times, backing off, then Sleight of Fist-into-rooting, that style simply does not suit Ember Spirit.Chaining your root too early is a common mistake, and it's especially lethal against heroes with long cast-point abilities like  Pangolier. Take Pangolier: if you get on top of him and immediately cast Searing Chains, the moment the disable ends he pops
  Rolling Thunder and you can't kill him at all. The right approach is to actively stick to him and wait for the cast animation of Rolling Thunder to appear, then cast Searing Chains to interrupt the cast and finish the kill. So catching the enemy's key ability at its cast point before rooting is of utmost importance.
Pangolier. Take Pangolier: if you get on top of him and immediately cast Searing Chains, the moment the disable ends he pops Rolling Thunder and you can't kill him at all. The right approach is to actively stick to him and wait for the cast animation of Rolling Thunder to appear, then cast Searing Chains to interrupt the cast and finish the kill. So catching the enemy's key ability at its cast point before rooting is of utmost importance.Another note: casting Searing Chains out of fog has special timing requirements. With vision on the enemy, Sleight of Fist into Searing Chains can land instantly and reliably; in fog you must wait a brief moment longer—root only once you have vision, or the skill will whiff. The simple rule: with vision you can instantly Sleight of Fist into Searing Chains; without vision you need a short pause before committing. Catching the disable timing during chases matters most.
Searing Chains out of fog has special timing requirements. With vision on the enemy, Sleight of Fist into Searing Chains can land instantly and reliably; in fog you must wait a brief moment longer—root only once you have vision, or the skill will whiff. The simple rule: with vision you can instantly Sleight of Fist into Searing Chains; without vision you need a short pause before committing. Catching the disable timing during chases matters most.Searing Chains has a long 13-second cooldown, so you basically only cast it once per teamfight—the cast must have a clear purpose: locking the enemy inside Flame Guard's burn radius. Searing Chains has only two uses: holding the enemy so teammates can follow up, or pinning a target to keep eating Flame Guard damage. Flame Guard is your core damage, and you must use Searing Chains to guarantee burn coverage. Many players only use Searing Chains for chasing, completely wasting the skill's value.II. Skills: Sleight of Fist
Sleight of FistMany players mindlessly spam skills, and the downside of spamming Sleight of Fist is worse than wasting Searing Chains—don't just cast it the moment it's off cooldown. Early on, Sleight of Fist is mainly used to dodge skills or clean up kills; it should not be your opener.
Sleight of Fist is worse than wasting Searing Chains—don't just cast it the moment it's off cooldown. Early on, Sleight of Fist is mainly used to dodge skills or clean up kills; it should not be your opener.Many people don't understand the underlying logic of dodging with Sleight of Fist—it works by moving your hero model to avoid projectiles. For example, when  Queen of Pain throws
  Shadow Strike at you, as long as your model moves before the projectile lands, the dagger bounces back toward Queen of Pain. To dodge reliably, you must cast Sleight of Fist the instant she releases it, sliding your model inside hers so the projectile reflects. There's an easier method too: use creeps or neutral camps as cover—when Queen of Pain throws her dagger, if there are units between you, the projectile gets blocked by the creeps. When laning against Queen of Pain, always position the wave between the two of you so the creeps absorb the projectile, so you're not forced to instantly burn Sleight of Fist. The more cover units, the higher your dodging margin.
Sleight of Fist—it works by moving your hero model to avoid projectiles. For example, when Queen of Pain throws Shadow Strike at you, as long as your model moves before the projectile lands, the dagger bounces back toward Queen of Pain. To dodge reliably, you must cast Sleight of Fist the instant she releases it, sliding your model inside hers so the projectile reflects. There's an easier method too: use creeps or neutral camps as cover—when Queen of Pain throws her dagger, if there are units between you, the projectile gets blocked by the creeps. When laning against Queen of Pain, always position the wave between the two of you so the creeps absorb the projectile, so you're not forced to instantly burn Sleight of Fist. The more cover units, the higher your dodging margin.Like Searing Chains, Sleight of Fist should not be wasted for no reason. Against high-armor heroes like  Terrorblade, simply repeating Sleight of Fist tickle-damage is extremely low—especially since Ember Spirit's mainstream build doesn't stack raw attack damage. There are two common uses: comboing with Searing Chains, or actively getting in someone's face. You can use Sleight of Fist to supplement damage based on enemy armor, and also to dodge skills or chase fleeing enemies—this idea applies more in the early game. In the mid-to-late game, when Fire Remnant charges are plentiful and you have
  Black King Bar, you can cast more aggressively when there's a damage window; the playstyle shifts with game time. With only one point in Sleight of Fist early, absolutely do not spam it—it does almost no damage and should only be used to avoid key skills or secure last-hits while saving mana; later, with ample mana, you can cast it freely on cooldown for damage.
Searing Chains, Sleight of Fist should not be wasted for no reason. Against high-armor heroes like Terrorblade, simply repeating Sleight of Fist tickle-damage is extremely low—especially since Ember Spirit's mainstream build doesn't stack raw attack damage. There are two common uses: comboing with Searing Chains, or actively getting in someone's face. You can use Sleight of Fist to supplement damage based on enemy armor, and also to dodge skills or chase fleeing enemies—this idea applies more in the early game. In the mid-to-late game, when Fire Remnant charges are plentiful and you have Black King Bar, you can cast more aggressively when there's a damage window; the playstyle shifts with game time. With only one point in Sleight of Fist early, absolutely do not spam it—it does almost no damage and should only be used to avoid key skills or secure last-hits while saving mana; later, with ample mana, you can cast it freely on cooldown for damage.You also need to manage the combo-cooldown rhythm of Sleight of Fist and Searing Chains. Suppose you Sleight of Fist-into-Searing Chains to lock two enemies; afterward there's a gap where Sleight of Fist is back up but Searing Chains is still on cooldown. Don't rush to cast Sleight of Fist here—wait until Searing Chains is almost ready again so you can chain a second Sleight of Fist-into-Searing Chains lock. Because when you use the Sleight of Fist+Searing Chains combo, you usually want to hold the enemy, and when they run again you want to hold them again, so this combo should come back up together before you commit.
Sleight of Fist and Searing Chains. Suppose you Sleight of Fist-into-Searing Chains to lock two enemies; afterward there's a gap where Sleight of Fist is back up but Searing Chains is still on cooldown. Don't rush to cast Sleight of Fist here—wait until Searing Chains is almost ready again so you can chain a second Sleight of Fist-into-Searing Chains lock. Because when you use the Sleight of Fist+Searing Chains combo, you usually want to hold the enemy, and when they run again you want to hold them again, so this combo should come back up together before you commit.III. Skills: Flame Guard
Flame GuardFlame Guard's mechanics are fairly simple—its core function is continuous burn damage. But you must remember that in the current patch, for Ember Spirit, Flame Guard is absolutely the number-one damage source; internalizing this completely changes your teamfight thinking. To kill a target, don't poke from range—Ember Spirit is no longer a poke-and-kite hero; he's a close-quarters fighter. To deal full damage you must be close, and long-range poke is extremely inefficient. Flame Guard is this hero's damage core—keep that in mind.Flame Guard has another important use—efficient farming. The optimal farm routine is to push out a wave first, then use Fire Remnant to fly to another camp and pull two camps together to clear at once. This stacking-farm idea works in every jungle and every camp. Pulling multiple camps to farm together isn't complicated, but it's one of the most critical ways to boost your GPM. Many players only clear camps one at a time, and the gap is huge. Clearing one wave plus three camps at once, versus clearing just one wave and at most one camp, snowballs into an enormous economic gap over a whole game—take it seriously. Don't idle after clearing a wave; save Fire Remnant charges in advance and plan your next farming spot.Another efficient pattern: get behind the tower, pop Flame Guard, and aggro the wave, dragging it between two camps so one wave clears both jungle quadrants—harvesting wave and camps together. Repeatedly stacking and dual-farming waves-plus-camps is Ember Spirit's optimal farming accelerator.
Flame Guard, and aggro the wave, dragging it between two camps so one wave clears both jungle quadrants—harvesting wave and camps together. Repeatedly stacking and dual-farming waves-plus-camps is Ember Spirit's optimal farming accelerator.A few advanced movement tips: dropping Fire Remnant mid-Sleight of Fist greatly extends your dash distance, which is excellent for escaping when chased. The distance of Sleight of Fist-into-Fire Remnant far exceeds a plain Fire Remnant; the Fire Remnant mechanic is that the farther the distance, the faster you fly toward the Fire Remnant remnant, so this combo travels much faster than a plain Fire Remnant for both roaming and escaping—it's the strongest kiting/escape tool.
Fire Remnant mid-Sleight of Fist greatly extends your dash distance, which is excellent for escaping when chased. The distance of Sleight of Fist-into-Fire Remnant far exceeds a plain Fire Remnant; the Fire Remnant mechanic is that the farther the distance, the faster you fly toward the Fire Remnant remnant, so this combo travels much faster than a plain Fire Remnant for both roaming and escaping—it's the strongest kiting/escape tool.Once you have  Aghanim's Scepter in the late game, you can drop Fire Remnant while flying to another Fire Remnant; without Aghanim's Scepter you can't do this because the move speed isn't enough. With Aghanim's Scepter, you can chain Fire Remnant repeatedly, making you very hard to lock down the whole time. Fire Remnant isn't a straight-line projectile—you can adjust the cast angle to pull off all kinds of непредсказуемые displacement. For pure escaping, late-game chained-Fire Remnant kiting makes you almost untouchable.
Aghanim's Scepter in the late game, you can drop Fire Remnant while flying to another Fire Remnant; without Aghanim's Scepter you can't do this because the move speed isn't enough. With Aghanim's Scepter, you can chain Fire Remnant repeatedly, making you very hard to lock down the whole time. Fire Remnant isn't a straight-line projectile—you can adjust the cast angle to pull off all kinds of непредсказуемые displacement. For pure escaping, late-game chained-Fire Remnant kiting makes you almost untouchable.IV. Skill Build
In the current patch, the mainstream build for Ember Spirit is to max Flame Guard first—there's basically no alternative. Only when laning against  Keeper of the Light can you consider not maxing Flame Guard, opting to alternate points in your one and two instead—but the fault tolerance is extremely low, and it's only valuable against Keeper of the Light. In every other matchup, max Flame Guard; the other two skills have been nerfed repeatedly and their power has dropped sharply.
Ember Spirit is to max Flame Guard first—there's basically no alternative. Only when laning against Keeper of the Light can you consider not maxing Flame Guard, opting to alternate points in your one and two instead—but the fault tolerance is extremely low, and it's only valuable against Keeper of the Light. In every other matchup, max Flame Guard; the other two skills have been nerfed repeatedly and their power has dropped sharply.A few matchups allow minor build adjustments—the most typical being against  Puck, where you can go 2 points Flame Guard and 2 points Sleight of Fist. The standard build is 1 Flame Guard, 2 Sleight of Fist, 3 Flame Guard, 4 Searing Chains, 5 Flame Guard, maxing in that order. Against low-armor heroes like Puck, when you have a big lane advantage you can even go 2 Sleight of Fist and 1 Flame Guard, using Sleight of Fist for sustained harass—this is one of the few scenarios where extra Sleight of Fist points fit, and the same applies against Keeper of the Light. The core criterion for whether you can add more Sleight of Fist points is: is the enemy's armor extremely low, and can you постоянно harass with Sleight of Fist? But it's still not recommended—early Sleight of Fist damage is very low, and its core function is dodging skills and cleaning up fleeing low-HP targets; only Sleight of Fist-into-Searing Chains to lock when teammates can follow with control.
Puck, where you can go 2 points Flame Guard and 2 points Sleight of Fist. The standard build is 1 Flame Guard, 2 Sleight of Fist, 3 Flame Guard, 4 Searing Chains, 5 Flame Guard, maxing in that order. Against low-armor heroes like Puck, when you have a big lane advantage you can even go 2 Sleight of Fist and 1 Flame Guard, using Sleight of Fist for sustained harass—this is one of the few scenarios where extra Sleight of Fist points fit, and the same applies against Keeper of the Light. The core criterion for whether you can add more Sleight of Fist points is: is the enemy's armor extremely low, and can you постоянно harass with Sleight of Fist? But it's still not recommended—early Sleight of Fist damage is very low, and its core function is dodging skills and cleaning up fleeing low-HP targets; only Sleight of Fist-into-Searing Chains to lock when teammates can follow with control.After the laning phase, the standard build is 1 Searing Chains, 4 Sleight of Fist, 4 Flame Guard, leveling your ult whenever available. There are only two matchups where you might consider sub-maxing Searing Chains:  Storm Spirit and Queen of Pain; apart from those it's basically not recommended. Against mobile heroes like
  Slardar you can consider adding more points in Searing Chains, but Searing Chains's scaling is poor—maxing it only extends the control by 1.5 seconds, the mana cost keeps rising, and while the cooldown drops a bit, Ember Spirit's core playstyle is in-and-out kiting, so long-duration face-to-face rooting is very risky—once enemies build
  Manta Style or various dispel items, Searing Chains becomes useless. So the general choice is 1 Searing Chains, 4 Sleight of Fist, 4 Flame Guard; there's no need to early-rank the second level of your ult, and you fill in Searing Chains afterward.
Searing Chains, 4 Sleight of Fist, 4 Flame Guard, leveling your ult whenever available. There are only two matchups where you might consider sub-maxing Searing Chains: Storm Spirit and Queen of Pain; apart from those it's basically not recommended. Against mobile heroes like Slardar you can consider adding more points in Searing Chains, but Searing Chains's scaling is poor—maxing it only extends the control by 1.5 seconds, the mana cost keeps rising, and while the cooldown drops a bit, Ember Spirit's core playstyle is in-and-out kiting, so long-duration face-to-face rooting is very risky—once enemies build Manta Style or various dispel items, Searing Chains becomes useless. So the general choice is 1 Searing Chains, 4 Sleight of Fist, 4 Flame Guard; there's no need to early-rank the second level of your ult, and you fill in Searing Chains afterward.Talents: take the Flame Guard per-second damage bonus across the board; around level 20 both sides offer poor value, so pick freely; at 25 you must take the Fire Remnant charge cooldown reduction. Many players take the Searing Chains duration extension at 15, but after Searing Chains's nerf it only hits two units, and the extended control adds only 0.8 seconds—compared to the other side's Flame Guard double damage and +50 burn per second, there's no comparison. The 15-level Flame Guard damage talent is mandatory, no exceptions.
Flame Guard per-second damage bonus across the board; around level 20 both sides offer poor value, so pick freely; at 25 you must take the Fire Remnant charge cooldown reduction. Many players take the Searing Chains duration extension at 15, but after Searing Chains's nerf it only hits two units, and the extended control adds only 0.8 seconds—compared to the other side's Flame Guard double damage and +50 burn per second, there's no comparison. The 15-level Flame Guard damage talent is mandatory, no exceptions.V. Draft Logic and Matchups
Ember Spirit is a core hero that ties an entire draft together. Although damage comes from Flame Guard and mobility from Fire Remnant and Sleight of Fist, he's fundamentally a melee mid who can fill many gaps in a draft. When your positions 4 and 5 are ranged supports, pairing them with a melee mid is a highly synergistic, classic combination; meanwhile, few mids bring reliable control, and Ember Spirit exactly fills the team's engage-and-lock capability. Many drafts lack dive and initiation, and picking Ember Spirit solves that perfectly.The most important criterion at the draft stage is: does your team lack reliable lockdown control? The mid's core role is to patch the team's holes—when the lineup clearly lacks point-target lockdown, Ember Spirit exactly fills that gap. Also, Ember Spirit himself relies heavily on teammates to supplement follow-up damage; his own output isn't top-tier, especially when the lane was even and his farm is average, so he really needs teammates to add damage.
Ember Spirit exactly fills that gap. Also, Ember Spirit himself relies heavily on teammates to supplement follow-up damage; his own output isn't top-tier, especially when the lane was even and his farm is average, so he really needs teammates to add damage.Hardest lanes—first, a typical bad matchup is  Huskar; the lane is completely unplayable, and Huskar's skills can dispel Searing Chains; even if you build
  Spirit Vessel he'll purge it off. Flame Guard is useless against Huskar; his sustained burst can ignore the skill entirely, and all of Ember Spirit's mechanics are countered by Huskar. The common thread among most heroes that counter Ember Spirit is that they have a dispel that can remove Searing Chains.
  Slark is also an extremely hard matchup—he sticks to you, Fire Remnant can't fly away, and he can directly purge Searing Chains. Without Searing Chains, Ember Spirit can't stay close to deal damage with Flame Guard.
Huskar; the lane is completely unplayable, and Huskar's skills can dispel Searing Chains; even if you build Spirit Vessel he'll purge it off. Flame Guard is useless against Huskar; his sustained burst can ignore the skill entirely, and all of Ember Spirit's mechanics are countered by Huskar. The common thread among most heroes that counter Ember Spirit is that they have a dispel that can remove Searing Chains. Slark is also an extremely hard matchup—he sticks to you, Fire Remnant can't fly away, and he can directly purge Searing Chains. Without Searing Chains, Ember Spirit can't stay close to deal damage with Flame Guard.Two types of heroes naturally counter Ember Spirit: the first is melee heroes that can brawl in your face, like  Troll Warlord,
  Monkey King,
  Meepo; the second is heroes that Searing Chains can't pin at all—Slark, Huskar,
  Viper and other turret-output heroes. Conversely, Ember Spirit perfectly counters agile heroes that fear close contact and can't endure long lockdowns, like Queen of Pain,
  Void Spirit, Storm Spirit, or
  Leshrac—they all hate being glued by Ember Spirit's Searing Chains. Ember Spirit also suppresses cores that can brawl up close for a long time, like
  Phantom Lancer and
  Spectre. When a fully-built Ember Spirit tangles with them, they simply can't kill you—you leverage agile movement for sustained chip damage, and Ember Spirit has a huge advantage in a war of attrition, with a kit full of short-cooldown skills that gets stronger the longer the fight. But if the enemy is all hard-brawlers like
  Tidehunter, Viper, Slardar, this game will be extremely rough for Ember Spirit, and you won't dare to actively get in their face. Remember that Flame Guard is your entire damage core—once you can't get close to burn with Flame Guard, your damage drops to zero and you can only provide Searing Chains control for your team. That style isn't unusable, but it requires abundant team burst and clear overall matchup advantage—and it's by no means Ember Spirit's optimal playstyle.
Ember Spirit: the first is melee heroes that can brawl in your face, like Troll Warlord, Monkey King, Meepo; the second is heroes that Searing Chains can't pin at all—Slark, Huskar, Viper and other turret-output heroes. Conversely, Ember Spirit perfectly counters agile heroes that fear close contact and can't endure long lockdowns, like Queen of Pain, Void Spirit, Storm Spirit, or Leshrac—they all hate being glued by Ember Spirit's Searing Chains. Ember Spirit also suppresses cores that can brawl up close for a long time, like Phantom Lancer and Spectre. When a fully-built Ember Spirit tangles with them, they simply can't kill you—you leverage agile movement for sustained chip damage, and Ember Spirit has a huge advantage in a war of attrition, with a kit full of short-cooldown skills that gets stronger the longer the fight. But if the enemy is all hard-brawlers like Tidehunter, Viper, Slardar, this game will be extremely rough for Ember Spirit, and you won't dare to actively get in their face. Remember that Flame Guard is your entire damage core—once you can't get close to burn with Flame Guard, your damage drops to zero and you can only provide Searing Chains control for your team. That style isn't unusable, but it requires abundant team burst and clear overall matchup advantage—and it's by no means Ember Spirit's optimal playstyle.VI. Laning
At level 1 you almost always take Flame Guard. The first wave has a fixed approach—don't pop Flame Guard at the start. Opening with burn immediately drops multiple creeps to low HP at once, and since Ember Spirit has no burst skill—only sustained burn—you can't last-hit them individually, making the lane very uncomfortable. The correct play is to right-click a creep first, whittle one down alone, then pop Flame Guard; this lets you last-hit safely and also produces a great HP trade with the enemy hero. The opponent will inevitably come up to contest last-hits; Ember Spirit's level-1 lane is essentially a last-hit duel, and the burn will whittle the enemy's HP—once you have the trade advantage, they won't dare force-push the second wave and will eat heavy creep aggro, letting you coast through the early weak-laning phase. Watch the enemy's last-hitting habits and prioritize the creep they're attacking. Double-low creeps usually happen because you hit the ranged creep first—don't prioritize the ranged creep; focus the melee creep to avoid having both low at once. The second target should also be a melee creep; forcing trades easily causes double-low creeps again and prevents perfect wave control—this is the core detail of the first wave. The laning-phase core idea is to slowly stack your lane advantage with Flame Guard.
Flame Guard. The first wave has a fixed approach—don't pop Flame Guard at the start. Opening with burn immediately drops multiple creeps to low HP at once, and since Ember Spirit has no burst skill—only sustained burn—you can't last-hit them individually, making the lane very uncomfortable. The correct play is to right-click a creep first, whittle one down alone, then pop Flame Guard; this lets you last-hit safely and also produces a great HP trade with the enemy hero. The opponent will inevitably come up to contest last-hits; Ember Spirit's level-1 lane is essentially a last-hit duel, and the burn will whittle the enemy's HP—once you have the trade advantage, they won't dare force-push the second wave and will eat heavy creep aggro, letting you coast through the early weak-laning phase. Watch the enemy's last-hitting habits and prioritize the creep they're attacking. Double-low creeps usually happen because you hit the ranged creep first—don't prioritize the ranged creep; focus the melee creep to avoid having both low at once. The second target should also be a melee creep; forcing trades easily causes double-low creeps again and prevents perfect wave control—this is the core detail of the first wave. The laning-phase core idea is to slowly stack your lane advantage with Flame Guard.Adjust your build flexibly per matchup. In most games  Bottle is the mandatory first item, and after Bottle prioritize
  Magic Wand. A few exceptions—against frequent right-clickers with little spell harass like Viper, Huskar, or
  Lina,
Lina,  Magic Stick offers poor value. Against Lina you can consider just one Magic Stick, an extra
  Tango, and rush boots, or grab a
  Infused Raindrops at three minutes for comfort—all aimed at high spell-burst heroes. Against Pangolier you must build Magic Wand; he casts extremely frequently, and you should add a
  Ring of Protection—both of you are melee, trading in close range the whole time, and this item upgrades into
  Urn of Shadows later for high value. Many players rush Urn of Shadows before boots, which is highly unrecommended—early on Urn of Shadows charges are hard to stack, and missing movement speed greatly reduces your kiting.
Bottle is the mandatory first item, and after Bottle prioritize Magic Wand. A few exceptions—against frequent right-clickers with little spell harass like Viper, Huskar, or Lina, Magic Stick offers poor value. Against Lina you can consider just one Magic Stick, an extra Tango, and rush boots, or grab a Infused Raindrops at three minutes for comfort—all aimed at high spell-burst heroes. Against Pangolier you must build Magic Wand; he casts extremely frequently, and you should add a Ring of Protection—both of you are melee, trading in close range the whole time, and this item upgrades into Urn of Shadows later for high value. Many players rush Urn of Shadows before boots, which is highly unrecommended—early on Urn of Shadows charges are hard to stack, and missing movement speed greatly reduces your kiting.Make sure to be strong enough in lane early; once you have Urn of Shadows the advantage compounds. Urn of Shadows's damage isn't huge, and early in the lane it's hard to stack charges by killing the enemy support—the earliest you'll get charges is basically the six-minute rune fight, by which time you'll already have  Boots of Speed or even
  Phase Boots, making you far stronger, so just develop steadily in lane. Against a spell core like Storm Spirit you don't need Ring of Protection; just rush boots into Phase Boots—his physical output is low and the item gives almost zero value. The same goes for Queen of Pain; with her physical damage lacking, you don't need to pre-buy Ring of Protection for the Urn of Shadows, and can transition with
  Circlet instead. Another case: when you need cheap stat items early and most of the lane is just a last-hit contest with mediocre movement-item value—like against Puck—you can skip Ring of Protection for Circlet, which also builds into Urn of Shadows later from Circlet and gives great early stat value. Against melee hard-brawlers like Slardar, Circlet is also decent, but boots are extremely high priority for Ember Spirit: your core damage relies entirely on Flame Guard's close-range burn, and movement speed ensures you stick to the target to deal full damage—it's the foundation of your output. The key to mastering Ember Spirit and his laning damage logic is actively chasing the enemy to chip in melee—don't mindlessly pop Flame Guard every wave. Focus on last-hitting the first few waves; pop Flame Guard to burn only when the enemy actively approaches the wave; you don't need to hit the skill the instant creeps arrive. Accumulating small trade advantages is crucial.
Urn of Shadows the advantage compounds. Urn of Shadows's damage isn't huge, and early in the lane it's hard to stack charges by killing the enemy support—the earliest you'll get charges is basically the six-minute rune fight, by which time you'll already have Boots of Speed or even Phase Boots, making you far stronger, so just develop steadily in lane. Against a spell core like Storm Spirit you don't need Ring of Protection; just rush boots into Phase Boots—his physical output is low and the item gives almost zero value. The same goes for Queen of Pain; with her physical damage lacking, you don't need to pre-buy Ring of Protection for the Urn of Shadows, and can transition with Circlet instead. Another case: when you need cheap stat items early and most of the lane is just a last-hit contest with mediocre movement-item value—like against Puck—you can skip Ring of Protection for Circlet, which also builds into Urn of Shadows later from Circlet and gives great early stat value. Against melee hard-brawlers like Slardar, Circlet is also decent, but boots are extremely high priority for Ember Spirit: your core damage relies entirely on Flame Guard's close-range burn, and movement speed ensures you stick to the target to deal full damage—it's the foundation of your output. The key to mastering Ember Spirit and his laning damage logic is actively chasing the enemy to chip in melee—don't mindlessly pop Flame Guard every wave. Focus on last-hitting the first few waves; pop Flame Guard to burn only when the enemy actively approaches the wave; you don't need to hit the skill the instant creeps arrive. Accumulating small trade advantages is crucial.Never use Sleight of Fist to poke under the enemy tower—the damage is extremely low and it completely wastes mana. For example, Pangolier now has nine armor, and Sleight of Fist only ticks about forty damage on him—a level-one skill with dismal value. Compare to standard spells: a normal spell like  Frost Blast costs 110 mana for 120 damage, and the baseline for standard spells is that damage at least matches—or exceeds—the mana cost. If Sleight of Fist's total damage is less than the mana spent, or the enemy is healthy and you can't sustain pressure, there's no reason to cast it at all. Never cast Sleight of Fist under the tower—even against Puck, wait until they step out of tower range before acting; no rush. Sleight of Fist's cooldown is a long 13 seconds and can't be wasted—remember that Flame Guard is your core damage tool.
Sleight of Fist to poke under the enemy tower—the damage is extremely low and it completely wastes mana. For example, Pangolier now has nine armor, and Sleight of Fist only ticks about forty damage on him—a level-one skill with dismal value. Compare to standard spells: a normal spell like Frost Blast costs 110 mana for 120 damage, and the baseline for standard spells is that damage at least matches—or exceeds—the mana cost. If Sleight of Fist's total damage is less than the mana spent, or the enemy is healthy and you can't sustain pressure, there's no reason to cast it at all. Never cast Sleight of Fist under the tower—even against Puck, wait until they step out of tower range before acting; no rush. Sleight of Fist's cooldown is a long 13 seconds and can't be wasted—remember that Flame Guard is your core damage tool.Another early-to-mid priority is to keep applying lane pressure—don't let the opponent farm peacefully. Ember Spirit transforms at level 6; once he has Fire Remnant his fault tolerance is extremely high and he's very hard to kill in most situations. Keeping one Fire Remnant behind you and actively chasing the enemy is the optimal play.
Ember Spirit transforms at level 6; once he has Fire Remnant his fault tolerance is extremely high and he's very hard to kill in most situations. Keeping one Fire Remnant behind you and actively chasing the enemy is the optimal play.At the six-minute rune spawn there's another key play: predict which rune spot the enemy is most likely to go to, drop a Fire Remnant at the other spot, then actively contest your side. The general idea: when you have lane advantage and higher personal strength, predict the unoccupied rune spot and actively contest the other side. Executing this requires that you've built a lane advantage and have vision or kill potential, which greatly raises your odds of securing the rune. Also, often killing the enemy support or bursting down the core in the rune fight is more valuable than forcibly contesting the rune itself—especially since Ember Spirit has a unique Fire Remnant-based fountain-return healing mechanic and isn't as reliant on rune healing as other heroes. But securing the rune has one advantage over returning to heal: your TP scroll stays off cooldown, so after grabbing the rune you can immediately teleport to another lane to roam and gank.
Fire Remnant at the other spot, then actively contest your side. The general idea: when you have lane advantage and higher personal strength, predict the unoccupied rune spot and actively contest the other side. Executing this requires that you've built a lane advantage and have vision or kill potential, which greatly raises your odds of securing the rune. Also, often killing the enemy support or bursting down the core in the rune fight is more valuable than forcibly contesting the rune itself—especially since Ember Spirit has a unique Fire Remnant-based fountain-return healing mechanic and isn't as reliant on rune healing as other heroes. But securing the rune has one advantage over returning to heal: your TP scroll stays off cooldown, so after grabbing the rune you can immediately teleport to another lane to roam and gank.After six minutes you have three choices: hard-farm, keep pressuring mid, or roam other lanes. To repeat: Ember Spirit's damage mostly comes from Flame Guard, and you must get in the enemy's face to deal full damage. The criterion for these choices is mainly your current strength—pure hard-farming is always the worst option. Sending only Fire Remnant to clear two jungle quadrants is something to consider only when there's nothing else to do. Ember Spirit has a unique-tier advantage: he can invade the enemy jungle to steal camps, push the wave into the tower then steal two enemy camps, or use his high fault tolerance to body-pressure the enemy mid—these are core early-game plays. This hero almost never risks dying, so leverage that to actively force trades. Even if a trade doesn't yield a kill, burning two of his skills and lowering his HP is a win—in the subsequent rune contest his HP disadvantage hands you the initiative, helping with rune control and the ensuing teamfights. The mid lane is won through accumulating tiny advantages.
Ember Spirit's damage mostly comes from Flame Guard, and you must get in the enemy's face to deal full damage. The criterion for these choices is mainly your current strength—pure hard-farming is always the worst option. Sending only Fire Remnant to clear two jungle quadrants is something to consider only when there's nothing else to do. Ember Spirit has a unique-tier advantage: he can invade the enemy jungle to steal camps, push the wave into the tower then steal two enemy camps, or use his high fault tolerance to body-pressure the enemy mid—these are core early-game plays. This hero almost never risks dying, so leverage that to actively force trades. Even if a trade doesn't yield a kill, burning two of his skills and lowering his HP is a win—in the subsequent rune contest his HP disadvantage hands you the initiative, helping with rune control and the ensuing teamfights. The mid lane is won through accumulating tiny advantages.Whenever there's a chance, keep pressuring mid; once Ember Spirit's economy rolls, his strength jumps disпостоянно—as long as you can reliably suppress the opponent, hard-farming mid waves is totally fine. If you can't suppress them, then choose to roam or jungle. Never rigidly stand mid clearing wave after wave slowly—it's a pure waste of time. You can dual-farm one wave plus two camps at once, or roam to gank and keep applying pressure; don't idle in place.
Ember Spirit's economy rolls, his strength jumps disпостоянно—as long as you can reliably suppress the opponent, hard-farming mid waves is totally fine. If you can't suppress them, then choose to roam or jungle. Never rigidly stand mid clearing wave after wave slowly—it's a pure waste of time. You can dual-farm one wave plus two camps at once, or roam to gank and keep applying pressure; don't idle in place.VII. Items
In the current patch, the general build path for Ember Spirit is: after Phase Boots, build Spirit Vessel or  Mage Slayer, with Spirit Vessel recommended first. Mage Slayer only provides regen without HP, while Spirit Vessel adds HP and armor—Ember Spirit needs to fight in close range, so tankiness is critical. Spirit Vessel fits more matchups, but against sustained-output heroes like Leshrac and Queen of Pain, Mage Slayer works better. In most games Spirit Vessel is still stronger; in a few matchups you build both, in the order Spirit Vessel then Mage Slayer. This fits matchups where both are suitable and you don't need an early Black King Bar. If the enemy has Pangolier, you must rush Black King Bar; he'll постоянно drain your mana and body-check you, leaving you unable to output at all. With Black King Bar you can ignore his ult, actively get in his face with Searing Chains to force him to pop his ult to escape, and after his skills are spent the teamfight is easy.
Ember Spirit is: after Phase Boots, build Spirit Vessel or Mage Slayer, with Spirit Vessel recommended first. Mage Slayer only provides regen without HP, while Spirit Vessel adds HP and armor—Ember Spirit needs to fight in close range, so tankiness is critical. Spirit Vessel fits more matchups, but against sustained-output heroes like Leshrac and Queen of Pain, Mage Slayer works better. In most games Spirit Vessel is still stronger; in a few matchups you build both, in the order Spirit Vessel then Mage Slayer. This fits matchups where both are suitable and you don't need an early Black King Bar. If the enemy has Pangolier, you must rush Black King Bar; he'll постоянно drain your mana and body-check you, leaving you unable to output at all. With Black King Bar you can ignore his ult, actively get in his face with Searing Chains to force him to pop his ult to escape, and after his skills are spent the teamfight is easy.In most games you don't go straight to Black King Bar after Spirit Vessel; usually, if you're not building both Spirit Vessel and Mage Slayer, you pick one, then build  Kaya, then
  Aghanim's Shard, then consider other items. If you don't need Black King Bar, go Aghanim's Shard first—Aghanim's Shard is a damage-transforming item. Flame Guard is your core damage, but after Aghanim's Shard your Fire Remnant's damage is also huge, boosting not only teamfights but farming efficiency. Once Aghanim's Shard unlocks, dropping Fire Remnant into a camp clears the whole camp, and you can use Fire Remnant while roaming to farm without even joining fights—your economy skyrockets. While clearing one quadrant you can simultaneously clear two more camps; with Aghanim's Shard you can even harvest three camps plus one wave at once, opening a huge economic gap—that's the strength of this build.
Black King Bar after Spirit Vessel; usually, if you're not building both Spirit Vessel and Mage Slayer, you pick one, then build Kaya, then Aghanim's Shard, then consider other items. If you don't need Black King Bar, go Aghanim's Shard first—Aghanim's Shard is a damage-transforming item. Flame Guard is your core damage, but after Aghanim's Shard your Fire Remnant's damage is also huge, boosting not only teamfights but farming efficiency. Once Aghanim's Shard unlocks, dropping Fire Remnant into a camp clears the whole camp, and you can use Fire Remnant while roaming to farm without even joining fights—your economy skyrockets. While clearing one quadrant you can simultaneously clear two more camps; with Aghanim's Shard you can even harvest three camps plus one wave at once, opening a huge economic gap—that's the strength of this build.The standard completed build path is Phase Boots → Spirit Vessel → Kaya → Aghanim's Shard → Black King Bar, or Kaya → Black King Bar then fill in Aghanim's Shard. After this core, big-item choices depend on the game. Some players rush a naked Aghanim's Scepter, but it's not recommended. Ember Spirit's damage mostly comes from Flame Guard burn; at level 10 take the shield-absorb-damage talent, at 15 take Flame Guard per-second damage, at 20 both talents have low value, at 25 prioritize Fire Remnant cooldown reduction—only CDR lets you stay glued to maximize Flame Guard damage. On this basis, Kaya and  Kaya and Sange fit perfectly, enabling high-frequency Fire Remnant kiting. Aghanim's Scepter is very strong but only against squishy lineups; the condition for an early Aghanim's Scepter is: getting in close lets you instantly melt a squishy with no escape. For example, against
  Sniper, Aghanim's Scepter value is huge—fly in and solo-kill; but against sustained-output cores like Viper, Aghanim's Scepter value drops sharply—you dive the backline and get постоянно poisoned, forced to retreat with Fire Remnant, wasting your entry window; steady front-line kiting is better.
Phase Boots → Spirit Vessel → Kaya → Aghanim's Shard → Black King Bar, or Kaya → Black King Bar then fill in Aghanim's Shard. After this core, big-item choices depend on the game. Some players rush a naked Aghanim's Scepter, but it's not recommended. Ember Spirit's damage mostly comes from Flame Guard burn; at level 10 take the shield-absorb-damage talent, at 15 take Flame Guard per-second damage, at 20 both talents have low value, at 25 prioritize Fire Remnant cooldown reduction—only CDR lets you stay glued to maximize Flame Guard damage. On this basis, Kaya and Kaya and Sange fit perfectly, enabling high-frequency Fire Remnant kiting. Aghanim's Scepter is very strong but only against squishy lineups; the condition for an early Aghanim's Scepter is: getting in close lets you instantly melt a squishy with no escape. For example, against Sniper, Aghanim's Scepter value is huge—fly in and solo-kill; but against sustained-output cores like Viper, Aghanim's Scepter value drops sharply—you dive the backline and get постоянно poisoned, forced to retreat with Fire Remnant, wasting your entry window; steady front-line kiting is better.After Black King Bar, the optional big items are  Shiva's Guard and Aghanim's Scepter, chosen by matchup. The criterion is whether you lack armor or need a burst item for squishies. If the enemy has many physical cores, build
  Platemail first and upgrade into Shiva's Guard; if the enemy is all squishies with no escape, Aghanim's Scepter is optimal. Shiva's Guard generally isn't built early—only rush it when the enemy has high-physical-output heroes like
  Lycan or Terrorblade. Overall, the build path is Kaya → Aghanim's Shard → Black King Bar, then Kaya and Sange or Aghanim's Scepter, and round out with Shiva's Guard,
  Octarine Core,
  Wind Waker,
  Scythe of Vyse or other utility items as the game dictates—just be reasonable.
Black King Bar, the optional big items are Shiva's Guard and Aghanim's Scepter, chosen by matchup. The criterion is whether you lack armor or need a burst item for squishies. If the enemy has many physical cores, build Platemail first and upgrade into Shiva's Guard; if the enemy is all squishies with no escape, Aghanim's Scepter is optimal. Shiva's Guard generally isn't built early—only rush it when the enemy has high-physical-output heroes like Lycan or Terrorblade. Overall, the build path is Kaya → Aghanim's Shard → Black King Bar, then Kaya and Sange or Aghanim's Scepter, and round out with Shiva's Guard, Octarine Core, Wind Waker, Scythe of Vyse or other utility items as the game dictates—just be reasonable.VIII. Teamfights
In the mid game, farm while reading the map; Ember Spirit struggles to chase under tower protection and his output is very inefficient. The optimal idea is to shove the wave into the enemy tower, forcing them back to defend—no need to force a tower dive. In the vast majority of cases, don't blindly dive; wait for the enemy to leave tower protection and enter the jungle before looking for a kill—just handle the wave calmly, no need to rush a fight. Fully leverage Ember Spirit's top-tier map mobility to multi-lane farm. This is a mindset every mid player—even every Dota 2 player—should improve: you don't need to chase fights constantly; when you have downtime, handle waves and watch the map for opportunities.
Ember Spirit struggles to chase under tower protection and his output is very inefficient. The optimal idea is to shove the wave into the enemy tower, forcing them back to defend—no need to force a tower dive. In the vast majority of cases, don't blindly dive; wait for the enemy to leave tower protection and enter the jungle before looking for a kill—just handle the wave calmly, no need to rush a fight. Fully leverage Ember Spirit's top-tier map mobility to multi-lane farm. This is a mindset every mid player—even every Dota 2 player—should improve: you don't need to chase fights constantly; when you have downtime, handle waves and watch the map for opportunities.When you're close to completing Black King Bar, no need to force a fight; this item completely rewrites your teamfight style—once Black King Bar is done your combat power transforms, and you can dive straight into the enemy cluster, at which point you should group up with teammates more. Constantly judge whether you have combat value in the current fight; if there's no damage window, hard-farm and wait for the enemy to expose a positioning mistake before striking. Distinguish fights you should take from ones you should avoid—don't mindlessly chase enemies and waste lots of farming time. Balancing farm and fighting is a core lesson for mid laners and especially for Ember Spirit.
Black King Bar, no need to force a fight; this item completely rewrites your teamfight style—once Black King Bar is done your combat power transforms, and you can dive straight into the enemy cluster, at which point you should group up with teammates more. Constantly judge whether you have combat value in the current fight; if there's no damage window, hard-farm and wait for the enemy to expose a positioning mistake before striking. Distinguish fights you should take from ones you should avoid—don't mindlessly chase enemies and waste lots of farming time. Balancing farm and fighting is a core lesson for mid laners and especially for Ember Spirit.Before a teamfight, sort out the hero synergies between both sides—this directly determines the fight's direction. The core judgment is whether you can safely dive in melee; if you can't, never initiate—avoid inefficient fights that slow your development, and only engage when you can get in close to output and mount an offense. You'll see Ember Spirit switch between two states—sometimes fully committing, sometimes poking from the perimeter—and this push-and-pull is both the difficulty and the fun of the hero.
Ember Spirit switch between two states—sometimes fully committing, sometimes poking from the perimeter—and this push-and-pull is both the difficulty and the fun of the hero.In teamfights Ember Spirit has two modes: one doesn't chase full burst, just pokes and kites from range, using mobility to coordinate with teammates; the other goes all-in melee. The core criterion for choosing which is whether you can survive after diving in. You must learn to control this in-out rhythm—commit fully when it's time to deal damage, disengage decisively when it's time to retreat, and back off the moment Black King Bar ends. Ember Spirit's teamfight essence is repeated in-out kiting—balancing engage and retreat and learning to catch damage windows.
Ember Spirit has two modes: one doesn't chase full burst, just pokes and kites from range, using mobility to coordinate with teammates; the other goes all-in melee. The core criterion for choosing which is whether you can survive after diving in. You must learn to control this in-out rhythm—commit fully when it's time to deal damage, disengage decisively when it's time to retreat, and back off the moment Black King Bar ends. Ember Spirit's teamfight essence is repeated in-out kiting—balancing engage and retreat and learning to catch damage windows.After Aghanim's Shard, and especially after Aghanim's Scepter, teamfight logic shifts dramatically: Fire Remnant storage is higher, so keep an eye on replenishing Fire Remnant charges. In fights, each kill refreshes your Fire Remnant charges, so try to get melee-range kills on enemy heroes to stack charges—this is the core means of pumping up fight damage, and Aghanim's Shard's strength lies in unlimited chasing. During fight kills, try to stay within damage range to refresh Fire Remnant—don't waste free Fire Remnant charges; this is Ember Spirit's core late-game operation.
Aghanim's Shard, and especially after Aghanim's Scepter, teamfight logic shifts dramatically: Fire Remnant storage is higher, so keep an eye on replenishing Fire Remnant charges. In fights, each kill refreshes your Fire Remnant charges, so try to get melee-range kills on enemy heroes to stack charges—this is the core means of pumping up fight damage, and Aghanim's Shard's strength lies in unlimited chasing. During fight kills, try to stay within damage range to refresh Fire Remnant—don't waste free Fire Remnant charges; this is Ember Spirit's core late-game operation.IX. Late Game
Many players reach the ultra-late game without knowing how to deal full damage—to reiterate: Flame Guard is your entire damage source, and without sticking to enemies you can't deal burn damage at all. Internalizing the teamfight kite-and-in-out rhythm is crucial; Fire Remnant is the key tool for getting in close, which is also why Black King Bar is mandatory—only with Black King Bar can you safely get on top of someone. The vast majority of your damage comes from Fire Remnant melee dashes combined with sustained Flame Guard burn.
Flame Guard is your entire damage source, and without sticking to enemies you can't deal burn damage at all. Internalizing the teamfight kite-and-in-out rhythm is crucial; Fire Remnant is the key tool for getting in close, which is also why Black King Bar is mandatory—only with Black King Bar can you safely get on top of someone. The vast majority of your damage comes from Fire Remnant melee dashes combined with sustained Flame Guard burn.You also need to distinguish which heroes you can kill: squishy supports can basically be one-shot; if an enemy builds  Silver Edge, you need
  Dust of Appearance, or have a teammate buy a
  Gem of True Sight to catch them. Mid-to-late Ember Spirit focuses on instant burst to delete squishies—figure out which targets require teammate help to kill. Reading friend and foe threats is a late-game essential.
Silver Edge, you need Dust of Appearance, or have a teammate buy a Gem of True Sight to catch them. Mid-to-late Ember Spirit focuses on instant burst to delete squishies—figure out which targets require teammate help to kill. Reading friend and foe threats is a late-game essential.Another core late-game idea is creating uneven fights: Ember Spirit's split-push and distraction ability is extremely strong, so you don't need to force 5v5 front-to-front fights. You can mindlessly shove waves, keep a Fire Remnant near your teammates for on-demand teleport support, and force the enemy to split to handle the waves—creating numerical-superiority opportunities.
Ember Spirit's split-push and distraction ability is extremely strong, so you don't need to force 5v5 front-to-front fights. You can mindlessly shove waves, keep a Fire Remnant near your teammates for on-demand teleport support, and force the enemy to split to handle the waves—creating numerical-superiority opportunities.X. Other Tips
Once the game reaches the stage where the enemy's tier-one towers are all down, think about how to advance the tempo—either pull ahead economically or end in one push. Ember Spirit's wave-handling is top-tier and he excels at chasing, so try not to fight in front of the enemy tier-two; when opponents turtle under tower it's hard to chase. Force them into open map areas with disconnected positioning before fighting—this fits the hero's mechanics. If the enemy all turtles at tier-two, switch lanes to push and drop Fire Remnant along the way for on-demand regrouping with teammates. Whenever you leave an area, leave a Fire Remnant there to guarantee you can return anytime. If teammates group up to push, your job is to handle waves on each lane separately and keep pressure on enemy towers. Dropping Fire Remnant along your path while roaming and rotating is a universally good habit—useful for rotating, supporting, and farming.
Ember Spirit's wave-handling is top-tier and he excels at chasing, so try not to fight in front of the enemy tier-two; when opponents turtle under tower it's hard to chase. Force them into open map areas with disconnected positioning before fighting—this fits the hero's mechanics. If the enemy all turtles at tier-two, switch lanes to push and drop Fire Remnant along the way for on-demand regrouping with teammates. Whenever you leave an area, leave a Fire Remnant there to guarantee you can return anytime. If teammates group up to push, your job is to handle waves on each lane separately and keep pressure on enemy towers. Dropping Fire Remnant along your path while roaming and rotating is a universally good habit—useful for rotating, supporting, and farming.